


Wi-Fi Analyzing/Sniffing
By Guido Voigt
Keeping your network safe and protected from cyberattacks is crucial, and a thorough network assessment is essential to eliminate any security vulnerabilities. However, this assessment is not only for preventing security issues. A full network analysis also reveals your system’s efficiency and its overall effect on your bottom line. In fact, a strong network not only supports your company, it is your company, which makes network management particularly critical to your business. As reliability or efficiency issues are discovered, it is important to address the concerns effectively and completely.
This blog explains how to debug reliability or stability issues you may have on your Wi-Fi network as well as measure the roaming behavior of the clients in a multi-AP Wi-Fi Network.
With its long history in the deployment of networking products, Lantronix equipment has been used to replace and/or interact with many legacy systems. Our equipment has been installed in various network-challenging environments, including sites with varying radio frequency (RF) limitations. These can include industrial locations with RF bandwidth saturation at varying time-based and load-based infrastructure. Additionally, the plethora of networking protocols can force control plans as well as data plans to struggle to compete for bandwidth usage.
In modern IoT and Industrial Wi-Fi setups, the roaming performance and handover timeout are essential.
Some of the Lantronix products that we have helped achieve exceptional performance and reliability include our xPico 200 series.
Once you have a good topology configured and have good communication established, you may want to analyze network performance by observing packet transmission, logging and “sniffing” data packet transmission.
Hardware
This is the hardware we recommend for Wi-Fi sniffing:
- CSL USB 2.0 WLAN Adapter 300Mbit (2,4/5GHz)
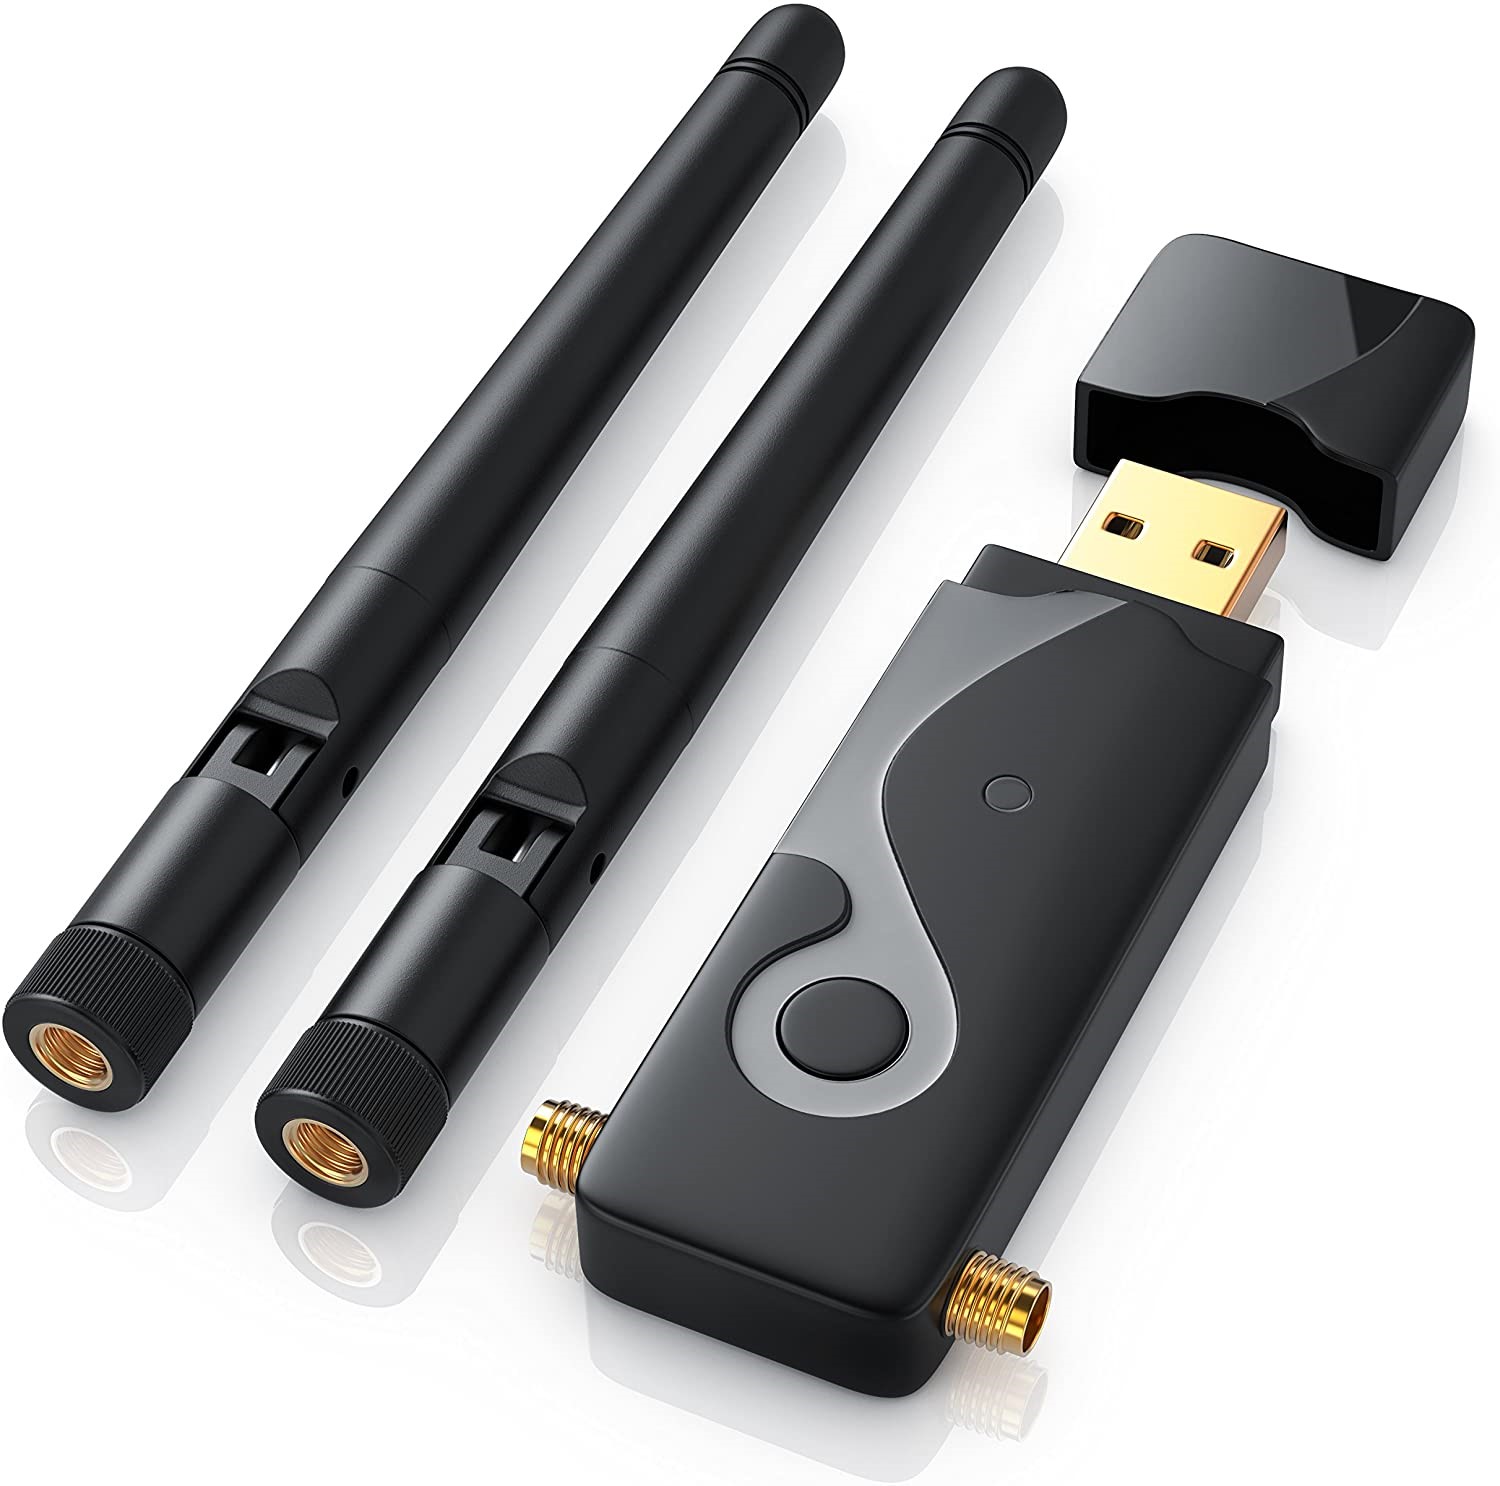
- Bild
- Optional AirPcap NX
- Optional Octoscope Device
This hardware is based on a Chipsatz: Ralink RT5572, is Dual Freq. 2.4 and 5 GHz and has RP-SMA Antenna Connectors. The standard Linux Kernel Driver has a built-in Monitor Mode, which is needed to retrieve all Wi-Fi Traffic. When using another Wi-Fi Stick/Module, make sure you have a Driver with Monitor Mode available.
Laptop Internal M.2 or mPCIe Card
For use with an INTEL-based card, such as:
– AC 9260 for up to 802.11 AC – AX200 for up to 802.11 AX
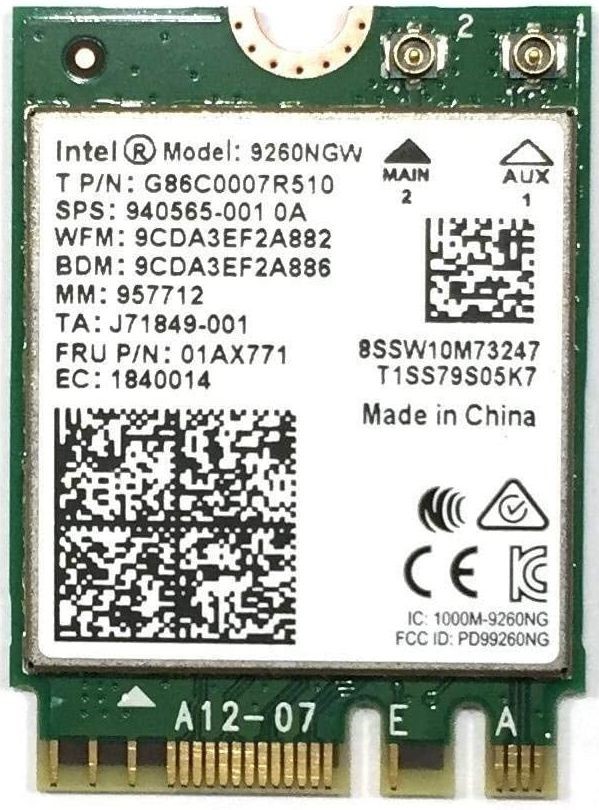
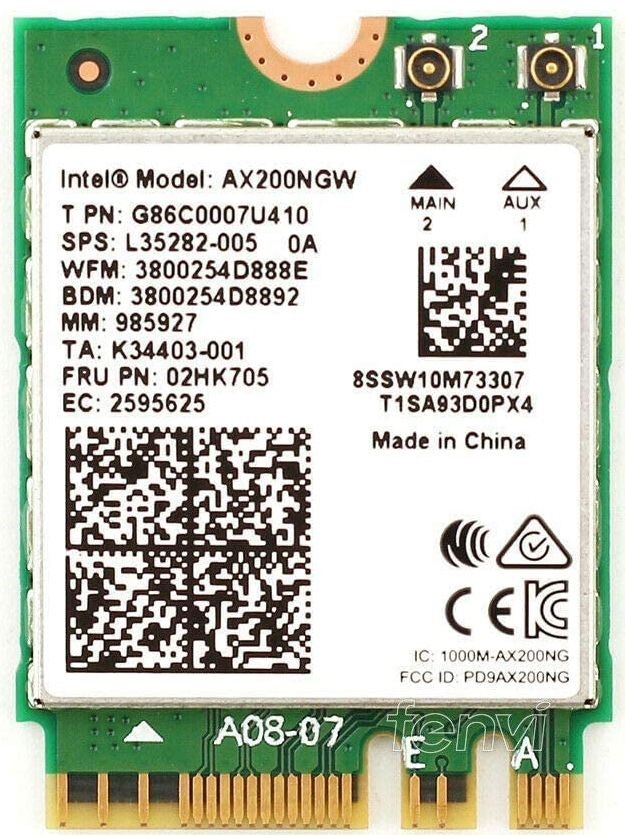
These modules are well-supported by the Linux Kernel drivers with activated Monitor Mode. It may be a bit tricky to get the Antenna cable + R-SMA Connector out, but these modules are an excellent choice.
Software
- Linux OS, such as an Ubuntu 20.04-based Linux 64bit
- Wireshark 3.2.5
- Other tools that can generate *.pcapng or *.pcap logfiles that can be analyzed
Lantronix provides a script to automatically set up and configure the Wi-Fi hardware driver, the Linux Network Subsystem and Wireshark with all the necessary parameters.
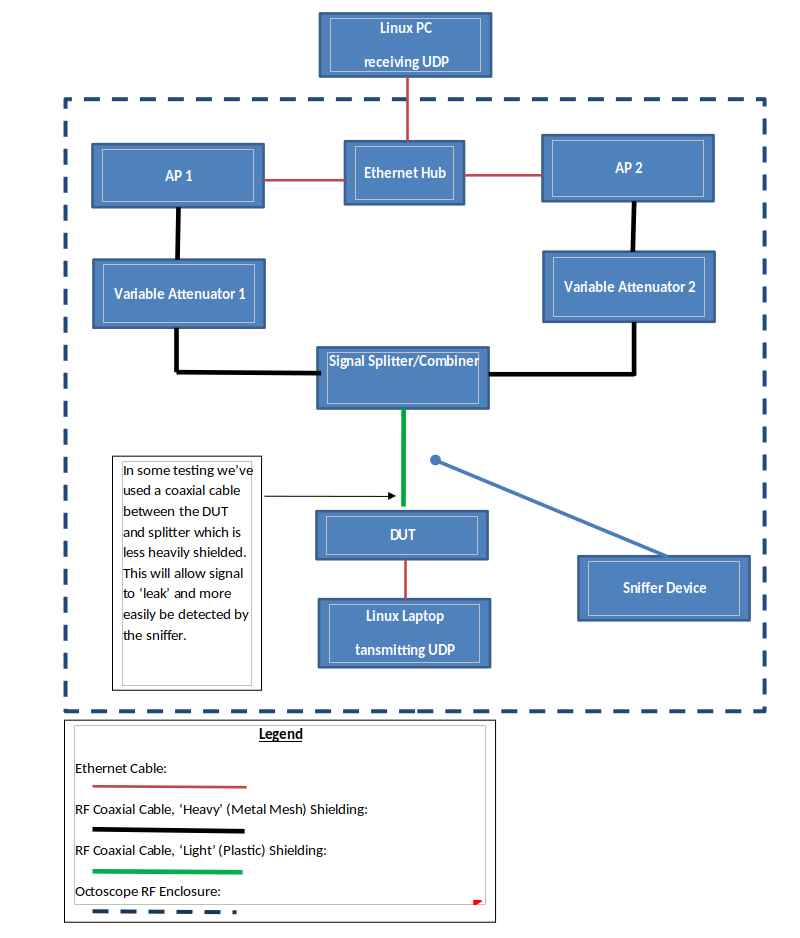
Test Setup
- Set up APs and DUT with WPA2-PSK CCMP/CCMP security with the same key
- Configure both APs with 50ms beacon intervals
- Set up both APs and the DUT on the same channel and same bandwidth (20MHz)
- Isolate as much as possible from other Wi-Fi networks or RF noise; it is best to locate all inside an isolation chamber
Roaming settings:
- Scan Interval: 8 seconds
- RSSI Delta (2.4 GHz): 9 dBm (may not applicable in this testing)
- RSSI Delta (5 GHz): 8 dBm
- Roam Threshold (2.4 GHz): -50 dBm (may not applicable in this testing)
- Roam Threshold (5 GHz): -50 dBm
Generate Data Traffic
- Set up Receive System (Linux PC/Laptop/Server)
- Set up iperf command (example: iperf -s -u -i1)
- Set up Sender System (Linux PC/Laptop/Server)
- Set up iperf command:
iperf -c<IP of Receiver> -u -b<data rate in Mbit/s>M -i1 -t<how long in s>
- Example:
iperf -c192.168.1.2 -u -b1M -i1 -t900
Notes
- Use the Wi-Fi interface of the selected hardware phy#*
- Check this by type without the new hardware installed iwconfig
- Connect the new hardware to your computer and run iwconfig again; a new device should appear wl*
wlxdc4ef4086948 IEEE 802.11 ESSID:off/any
Mode:Managed Access Point: Not-Associated Tx-Power=20 dBm
Retry short long limit:2 RTS thr:off Fragment thr:off
Power Management:off
wlp3s0 IEEE 802.11 ESSID:”FALINT”
Mode:Managed Frequency:2.422 GHz Access Point: 18:A6:F7:F4:D2:48
Bit Rate=300 Mb/s Tx-Power=22 dBm
Retry short limit:7 RTS thr:off Fragment thr:off
Power Management:on
- Start the script and choose the phy#* with the interface name wl*
phy#2
Interface wlxdc4ef4086948
ifindex 8
wdev 0x200000001
addr dc:4e:f4:08:69:48
type managed
txpower 20.00 dBm
phy#0
Interface wlp3s0
ifindex 3
addr 7c:5c:f8:e4:5d:e6
type P2P-device
txpower 0.00 dBm
- You need to have root access on your Linux system to be able to configure the Network Layer.
- After starting Wireshark, use the already marked interface, mon0, by clicking on the blue left top shark icon.
- Activate the Wireless Toolbar and go to the Wireshark Menu Bar: View -> Wireless Toolbar and click to activate.
- In the Wireless Toolbar, mon0 should be shown as the Interface, and the channel you want to analyze should be shown.
- Use the drop-down box to select the needed channel.
- If you are not able to change the channel, your setup is not correct.
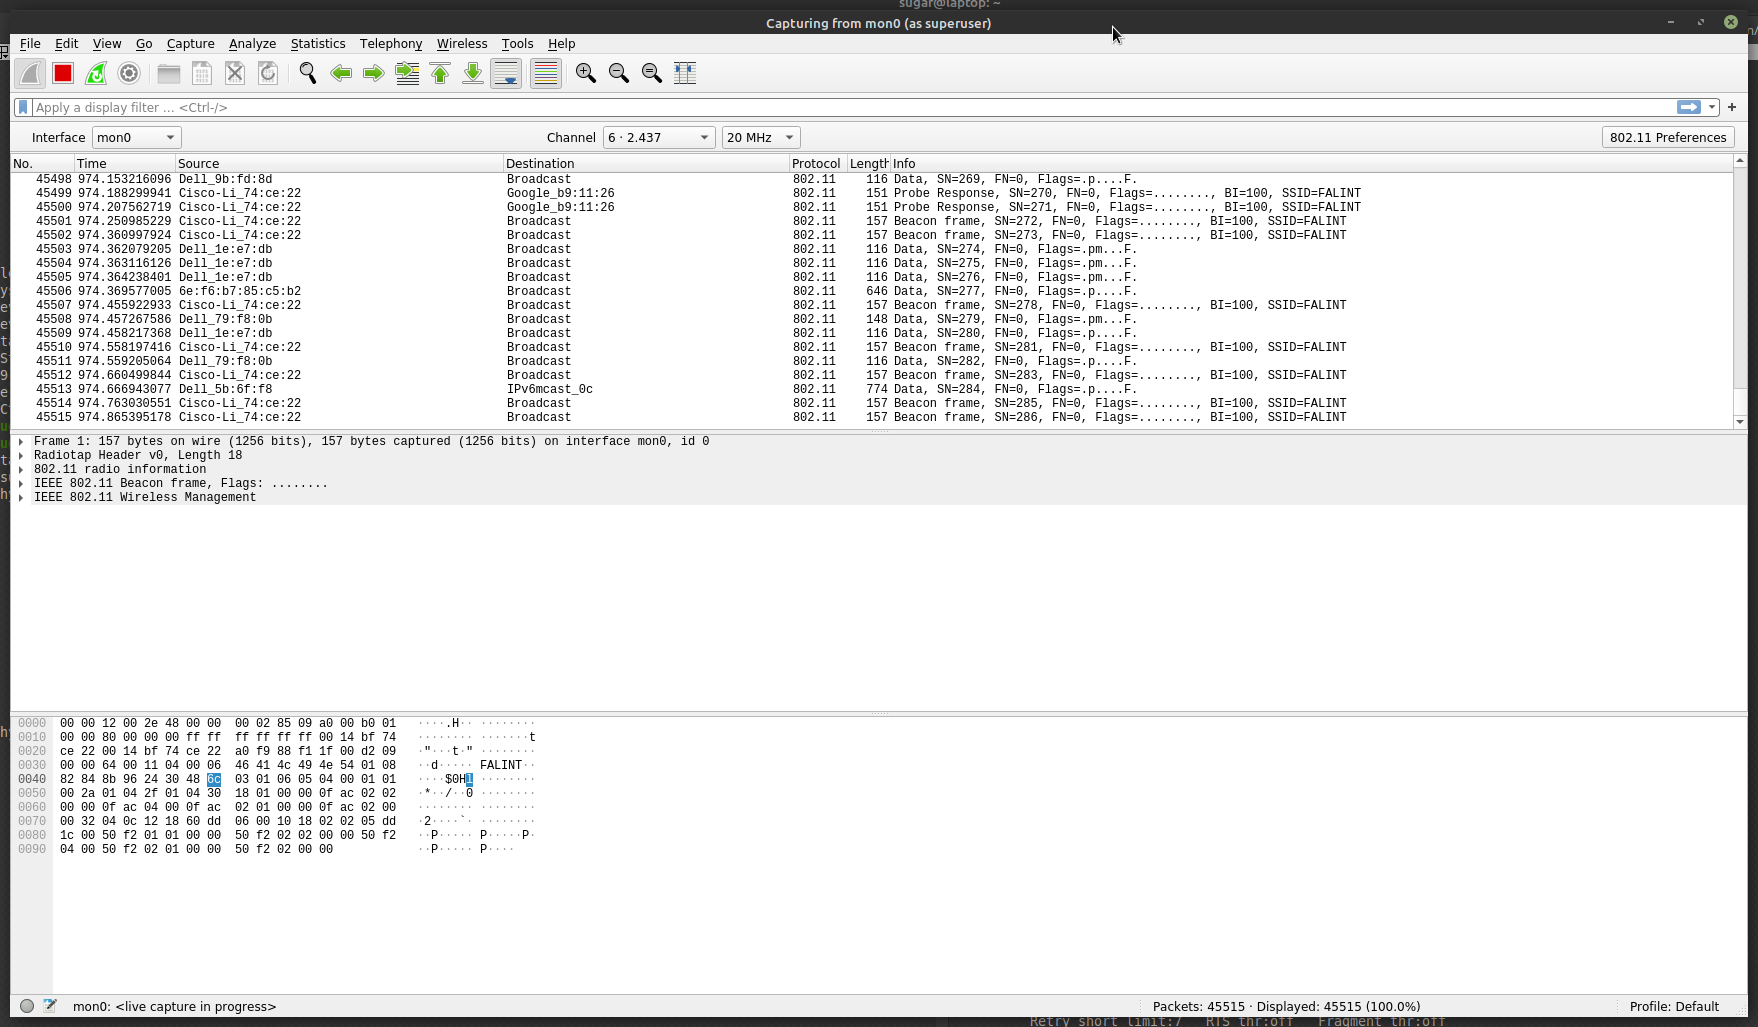
The Wi-Fi packages should show in the View like this:
- Generate PSK from SSIS+passphrase converter
Procedure of Full Valid Analyze
1. Set up both AP on:
- Same Wi-Fi channel
- Same bandwidth
- Same mode (a/b/g/n)
- Same SSID
- Same WPA2-PSK
2. Set up the Client device:
- Same WiFi channel (like both AP)
- Same bandwidth (like both AP)
- Same mode (a/b/g/n) (like both AP)
- Same SSID (like both AP)
- Same WPA2-PSK (like both AP)
3. Set up the Sniffer analyzer:
- Same Wi-Fi channel (like both AP)
- Same bandwidth (like both AP)
- Same mode (a/b/g/n) (like both AP) (if needed; throttle mode down)
- Set up the PSK in the analyzer tool (see generate PSK above)
- If PSK is NOT setup correctly, you will not be able to decode the Wi-Fi packages and see underlay IP data stream
4. Set up both variable Attenuator:
- 25 dB per step
- Dwell time ~250ms
- One with start at 0 and end with 60dB
- 2nd with start at 60 and end with 0dB
- Set up with ~1dB per second and 60dB, which will result in ~1 roam per minute
- Don’t start Attenuator now; keep both at 0dB!
- Start Sniffer / Analyze
- The analyzer will need to catch all 4-way attachment handshakes from the Client to one AP
- Start an iperf receive on a device in AP backend network (iperf -s -u -i1)
- Start/restart Client now to attach one of the AP
- Wait until you see any UDP/IP package like
8845 100.120437221 192.168.222.59 192.168.222.255 UDP 186 5448 → 1027 Len=92
- If you do not see this after 3–5 minutes and your Client is connected and can ping the desk, reconnect the Client again
- The sniffer/analyzer may not catch the PSK handling
- Create data traffic via the Wi-Fi by starting an iperf on a device connected to the client (iperf -c192.168.1.2 -u -b1M -i1 -t900)
- Set up the needed speed you prefer
- Start not both Attenuator of sweeping
- Log all traffic in a file
- Let it run for about 10min to be able to catch a min. of 10 roaming events. To analyze the roaming time, find in the logfile:
- Last UDP package to AP1 (via MAC address)
- First UDO package to the AP2 after the roam
- Calculate the time different of both packages
Related Posts

May 30, 2026 General
Reach Any Device in Your Network. Just Ask.
Percepxion with MCP gives your entire team natural language access to any device in your infrastructure, witho…
April 22, 2026 General
Earth Day Thoughts… How Out-of-Band Management Can Reduce Your Network’s Carbon Footprint
As we celebrate Earth Day, many organizations are looking for ways to align their IT operations with sustainab…